Use Case
User Story
As a Sales Manager, my team has issues following up with clients because of the lack of email addresses on Contacts in Salesforce.
Acceptance Criteria
That Sales User has all the information needed to contact clients, including phone and email addresses.
Problem
After researching, the Salesforce Admin noticed that many of the email address fields were blank on the Contact Records. The admin thought about making it a required field, but after talking to the Sales Manager, who was against making it a required field, primarily because he was afraid that if a Sales Rep did not have the email address that was required, they would just not created a contact at all.
Solution
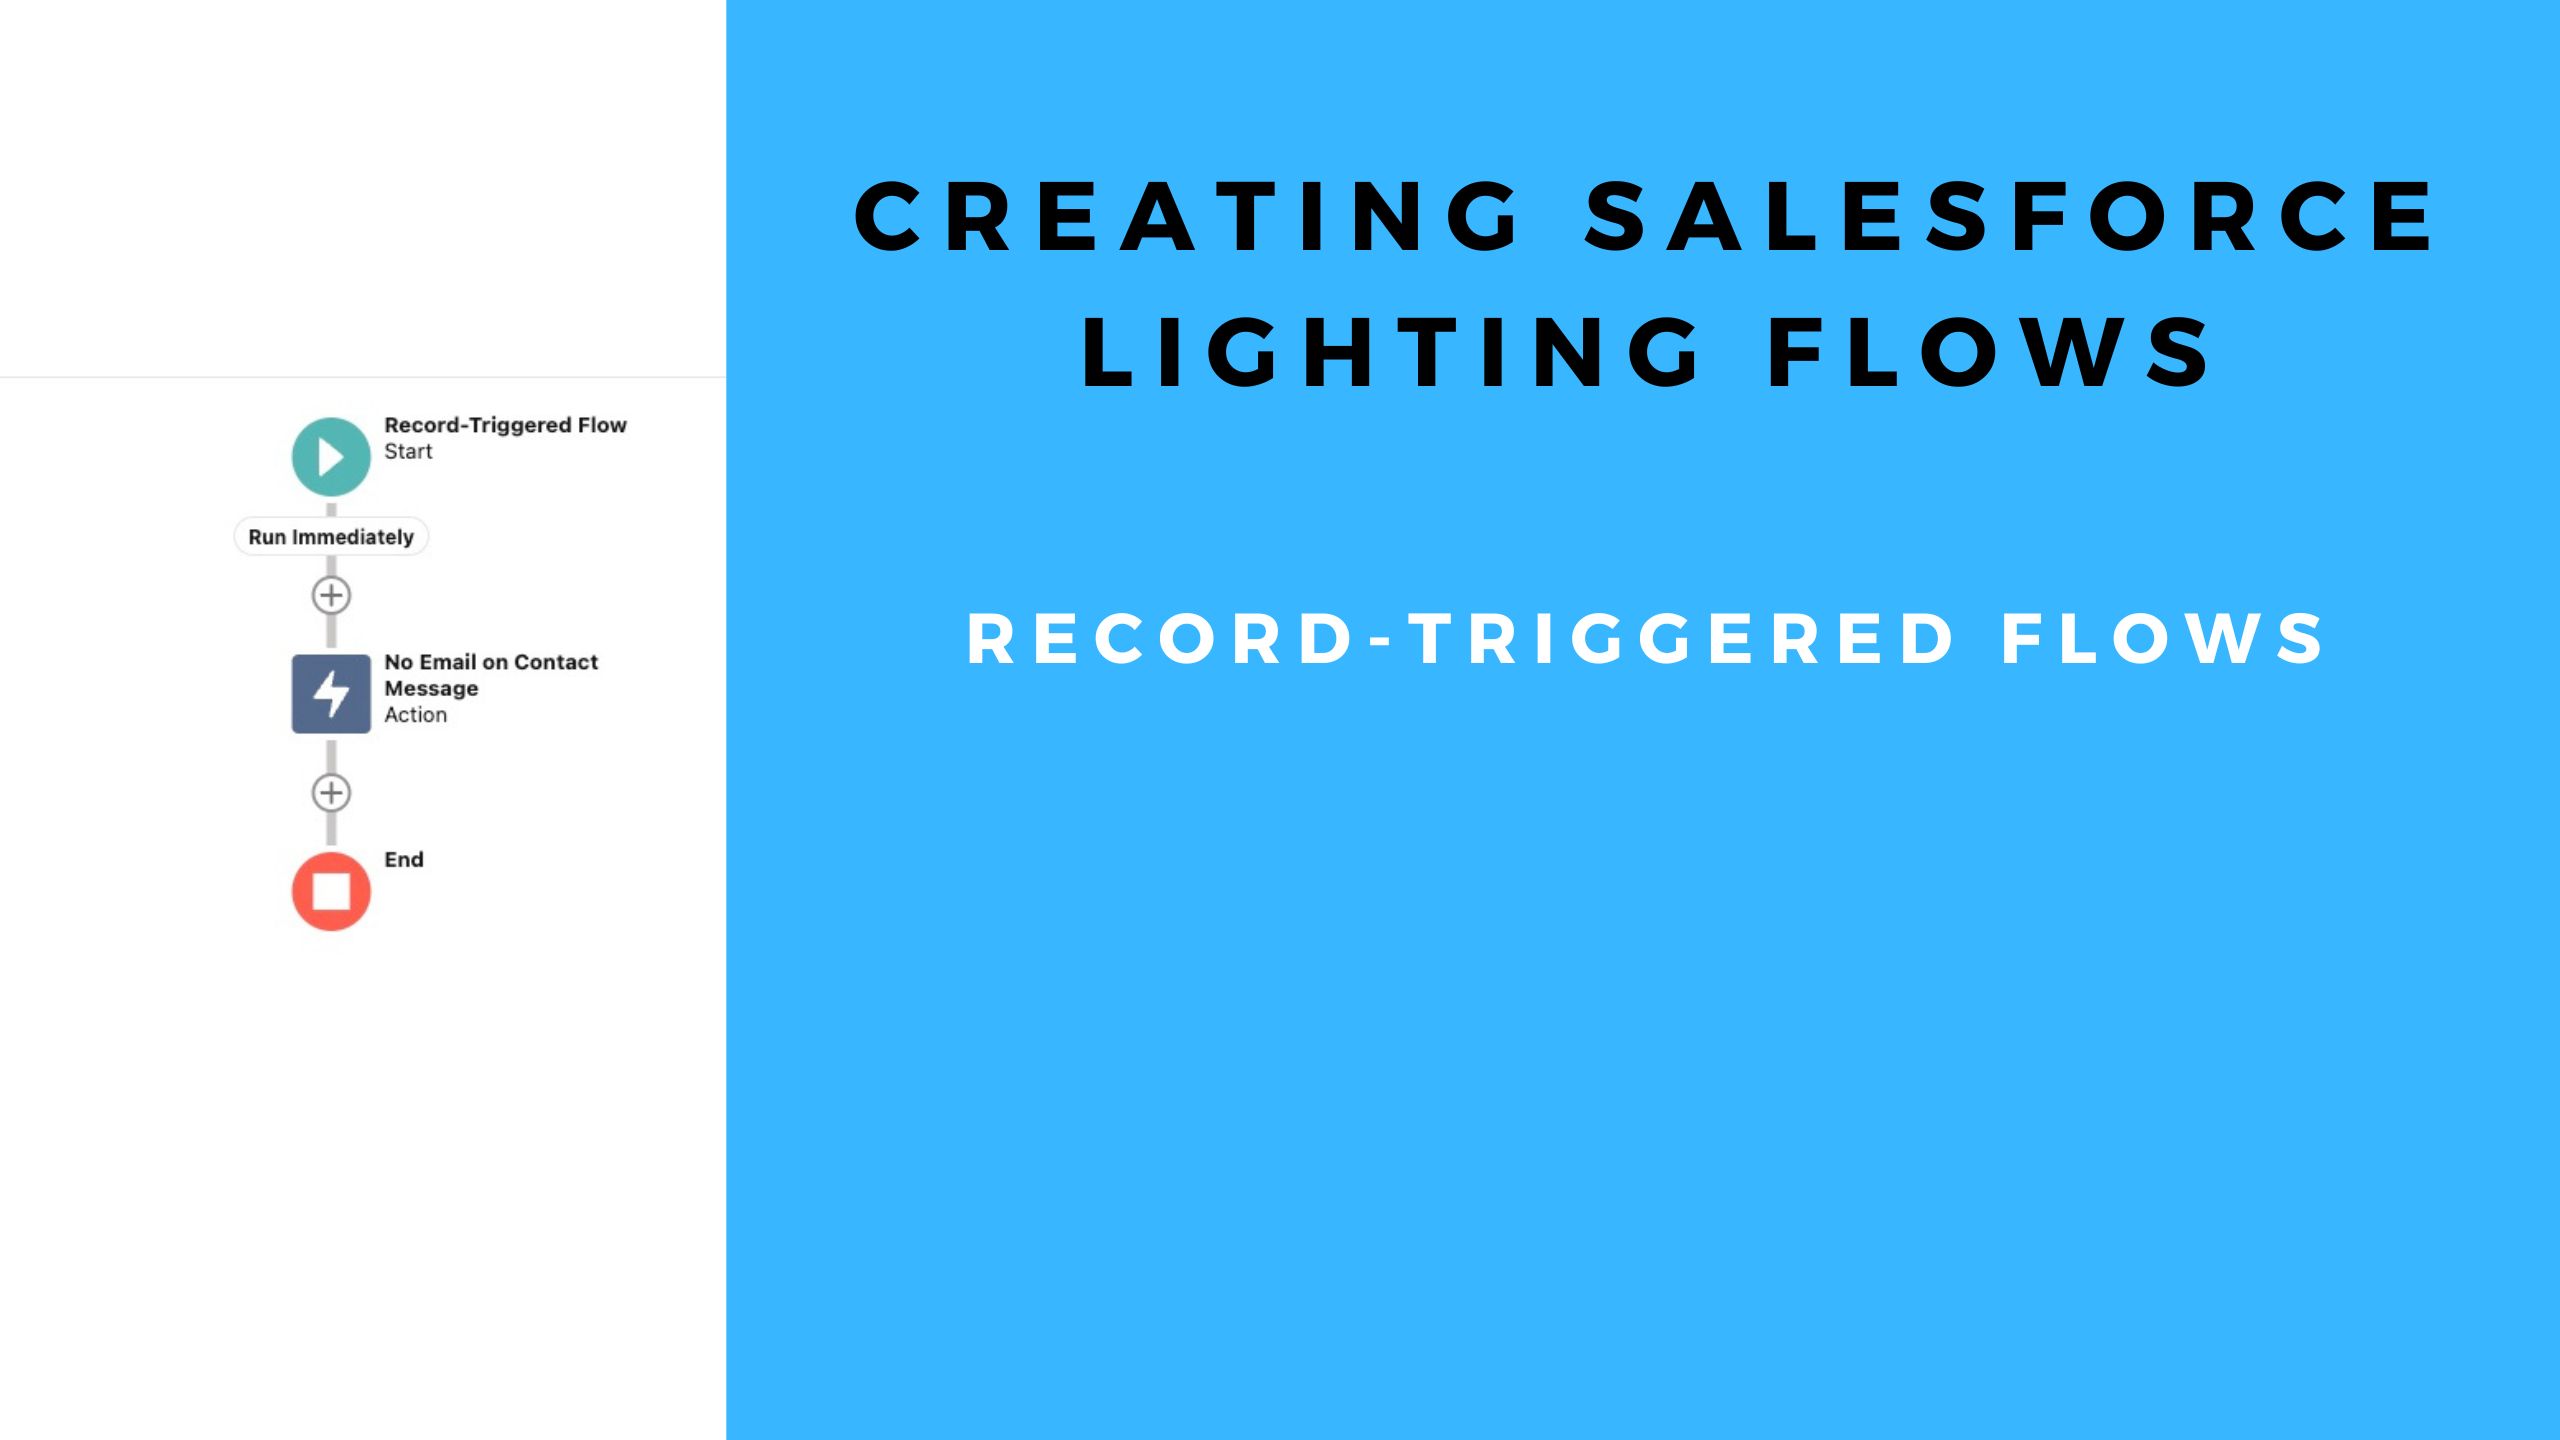
The Salesforce Admin created a Record-Triggered Flow that will send a Chatter Message to the Record Owner if the email field was left blank when creating a New Contact Record was saved.
How to Create a Record-Triggered Flow in Salesforce
Open Flow Builder
- Setup
- Enter Flows in the Quick Find box
- Click on Flows
- Click the New Flow Button
We want a Flow automated behind the scenes triggered when the Contact Record is saved. In this case, what we want is a Record-Triggered Flow.

Configure Start Criteria for the Flow
This brings up a screen to configure what triggers the Flow to execute. You will determine what Object the Flow runs on and what causes the Flow to start. Also, the entry conditions for this Flow will be set. Lastly, you will determine if the Flow runs before or after the save.
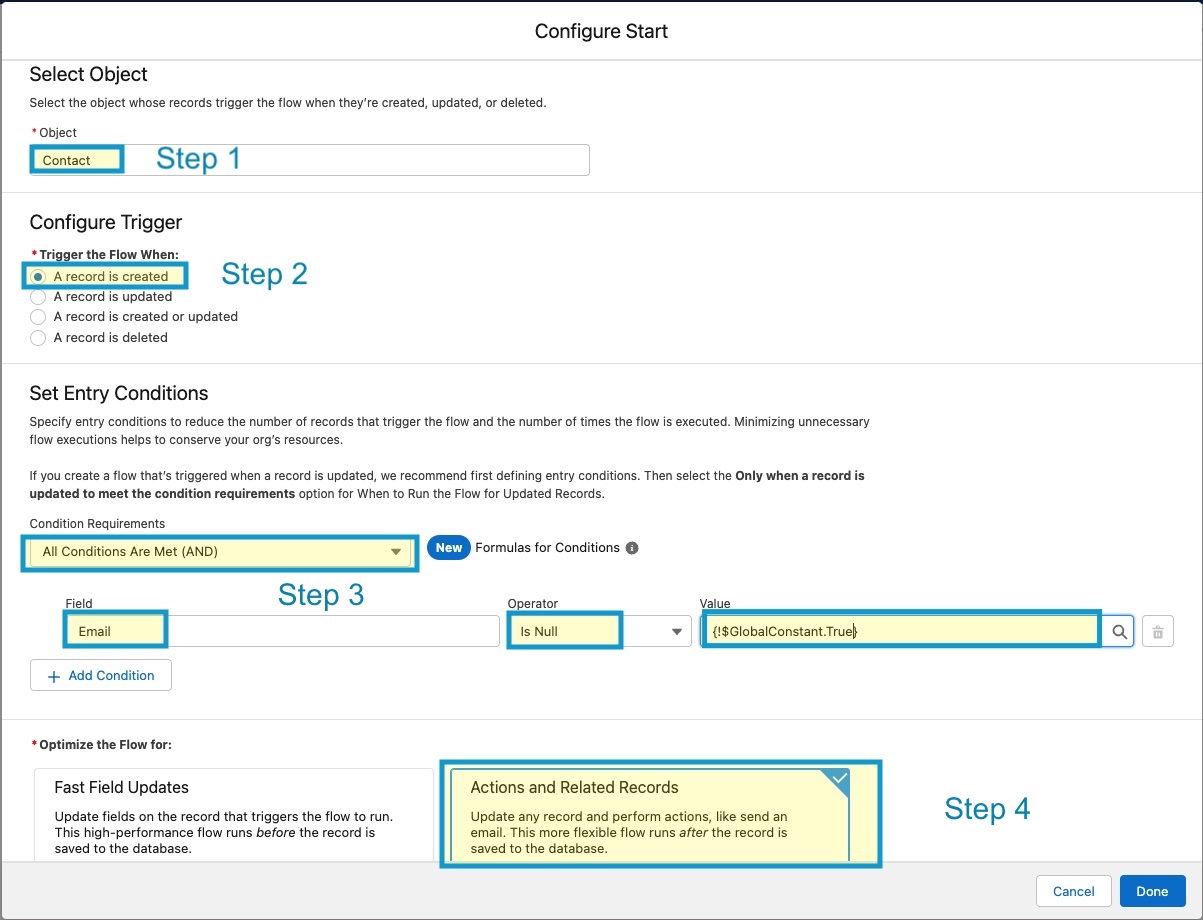
Step 1 – Choose the Object that Flow will be run on. In this case, it is the Contact Object.
Step 2 – Configure the Trigger. This Flow triggers when a record is created.
Step 3 – Determine the entry conditions. In this example, we want it to fire when All Conditions Are Met (AND).
- Field: Email
- Operator: Is Null
- Value: {!$GlobalConstant.True}
Step 4 – This is when we choose if the Flow runs before or after Save is clicked. In this case, we want it to run after the save. So we choose Actions and Related Records.
Click Done
Add Some Action to our Flow
The Action screen allows us to set the actions the Flow will perform. On this screen, we will
- Choose the Actions to perform
- Label the Actions
- Create an API Name
- Set the input Values and create the Chatter Message
Add an Action
- Click on the Plus Sign under Start
- Scroll down to the Interaction Section
- Click on Action
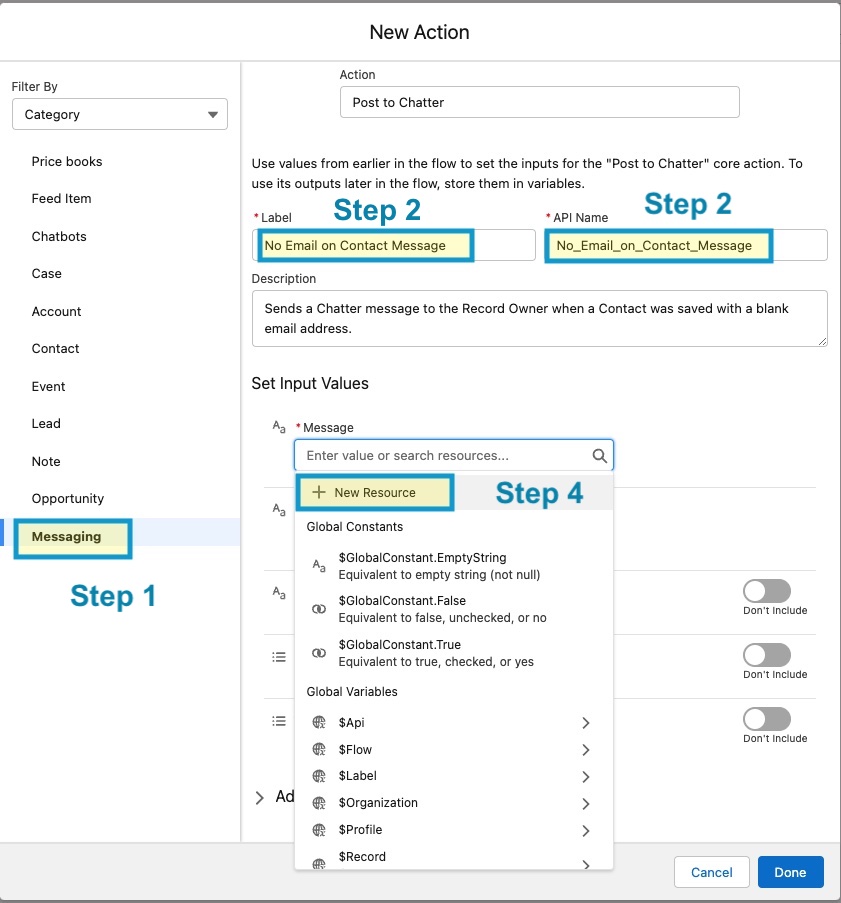
Step 1 – Choose the action we want to perform. On the left-hand side of the Filter by list, make sure Category is selected, then scroll down to Messaging.
Step 2 – Label: No Email On Contact Chatter Message
Step 3 – API Name: No_Email_On_Contact_Chatter_Message
Step 4 – Assign the Input Variable. In this case, it will be the message we want to send in a Chatter Post, and we need to create it. Click + New Resource
Creating the Chatter Message
After you Create + New Resource, you will be brought to the New Resource Screen. This is where you create the message you want to send in the Chatter message.
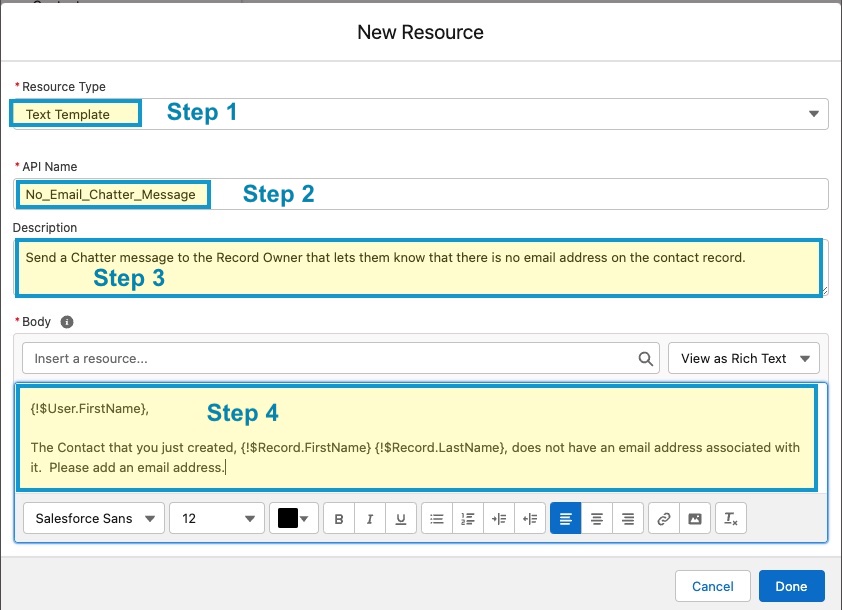
Step 1 – Choose Resource Type: Text Template
Step 2 – API Name: No_Email_Chatter_Message
Step 3 – Description: Send a Chatter message to the Record Owner that lets them know that no email address is listed on the Contact Record.
Step 4: Body: This is the body of your message. Here you can use the resource box to personalize the Chatter message to the Record Owner and the Record Information. Just click in the Insert a Resource box and fill out the information you want to use. In this example, we use Record Owner First Name and the First and Last Name on the Contact record.
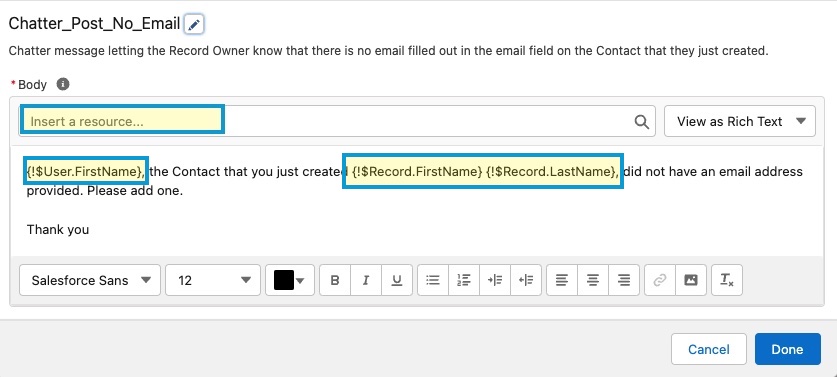
The resource box lets you choose {$User.FirstName} and {$Record.FirstName} {$Record.LastName} to personalize the Chatter Message.
After you have crafted the perfect Chatter Message. Click Done
Save and Activate the Flow
You have created the Flow. All you need to do now is Save and Activate your Flow.
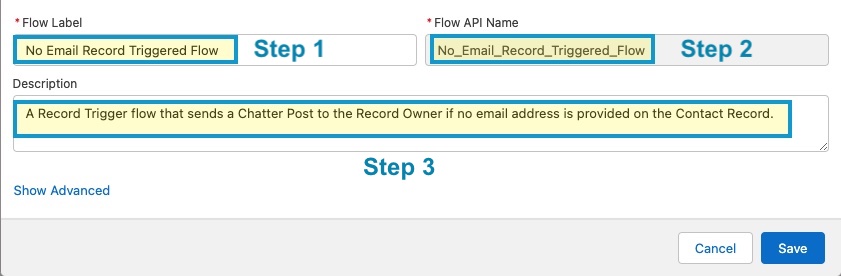
Here you fill in the information you want to use to Save your Flow.
Note: Do not forget to Active your Flow