
My wife always says I forget everything that she tells me to do, and she is probably correct. To help with this, I created a page on my website that will allow her to make a new case in my Salesforce Org. In this example, every time the web form is completed, it creates a new case in my Salesforce org, and Salesforce calls this Web-to-Case.
Web-to-Case: is a web form that is placed on your company website that allows a customer to create a new case in your Salesforce Org without having to contact you.
How to Setup Salesforce for Web-to-Case
The first thing we need to do is enable Web-to-Case in Salesforce, and this is done on the Web-to-Case setup page.
- Setup
- Type Web-to-Case in the quick search box
- Click on Web-to-Case
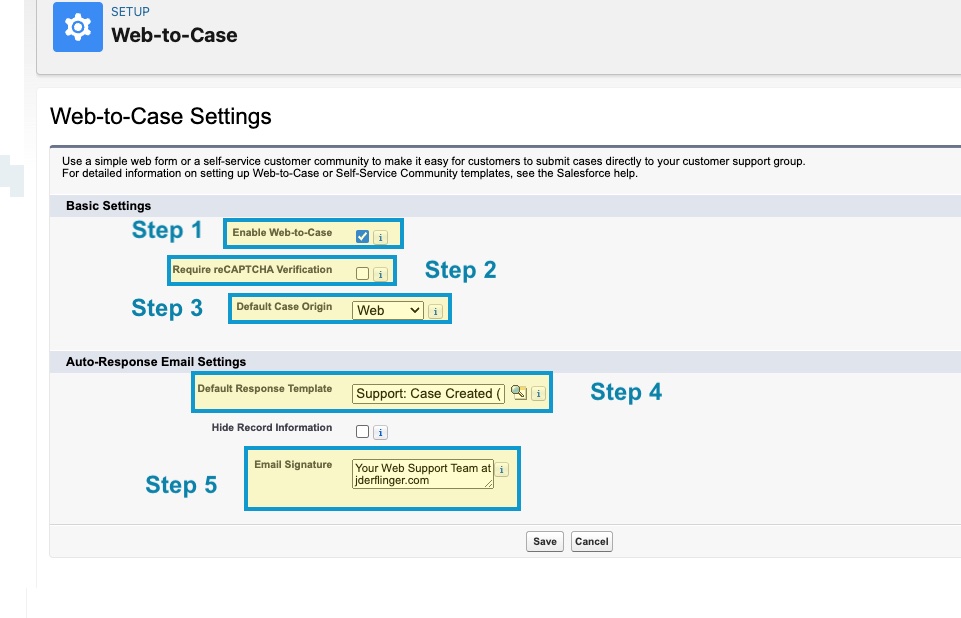
Step 1 – Enable Web-to-Case: Click the checkbox to Enable Web-to-Case
Step 2 – Require reCAPTCHA: Check if reCAPTCHA Verification is required: in this example, I left it unchecked.
Step 3 – Default Case Origin – Default Case Origin: I left it as the default of Web
Step 4 – Default Response: For this example, I left the default – Support: Case Created
Step 5 – Email Signature – What do you want the email signature to say? In this example, I just said it was from the Support Team.
Now we have set up everything we need to Enable Web-to-Case. Click Save and move on to the next step.
Web-to-Case HTML Generator Setup
Salesforce will automatically generate the HTML code you need to create the web form for Web-to-Case. Once this code is generated, all you need to do is get it to your website Administrator, and they will be able to embed it on your website, and you can start collecting information from your customers. So let’s go to the Web-to-Case HTML Generator page and get started.
- Setup
- Type Web-to-Case in the quick search
- Click on Web-to-Case HTML Generator
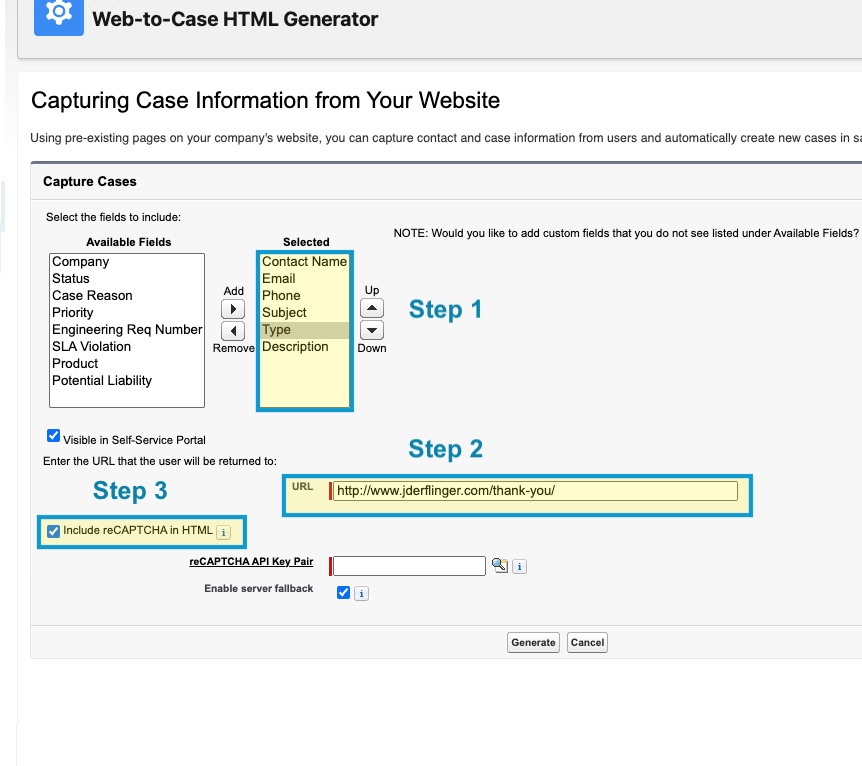
Step 1 – Field Selection: Move the Fields you want to capture to the Selected column. Notice here I have Contact Name, Email, Phone, Subject, Type, and Description.
Step 2 – Return URL: enter a page that you want the customer to be redirected to after they complete the form. I went to a thank you page.
Step 3 – reCAPTCHA: Check if you want to include a reCAPTCHA: I will uncheck this since it’s not on in the setup.
That is all you have to do on this page. Click Generate to have Salesforce Generate your HTML Code
Once you have that block of HTML code, send it to your website Administrator, and they will be able to embed it on your company’s website. Once it is embedded, it will look something like this:
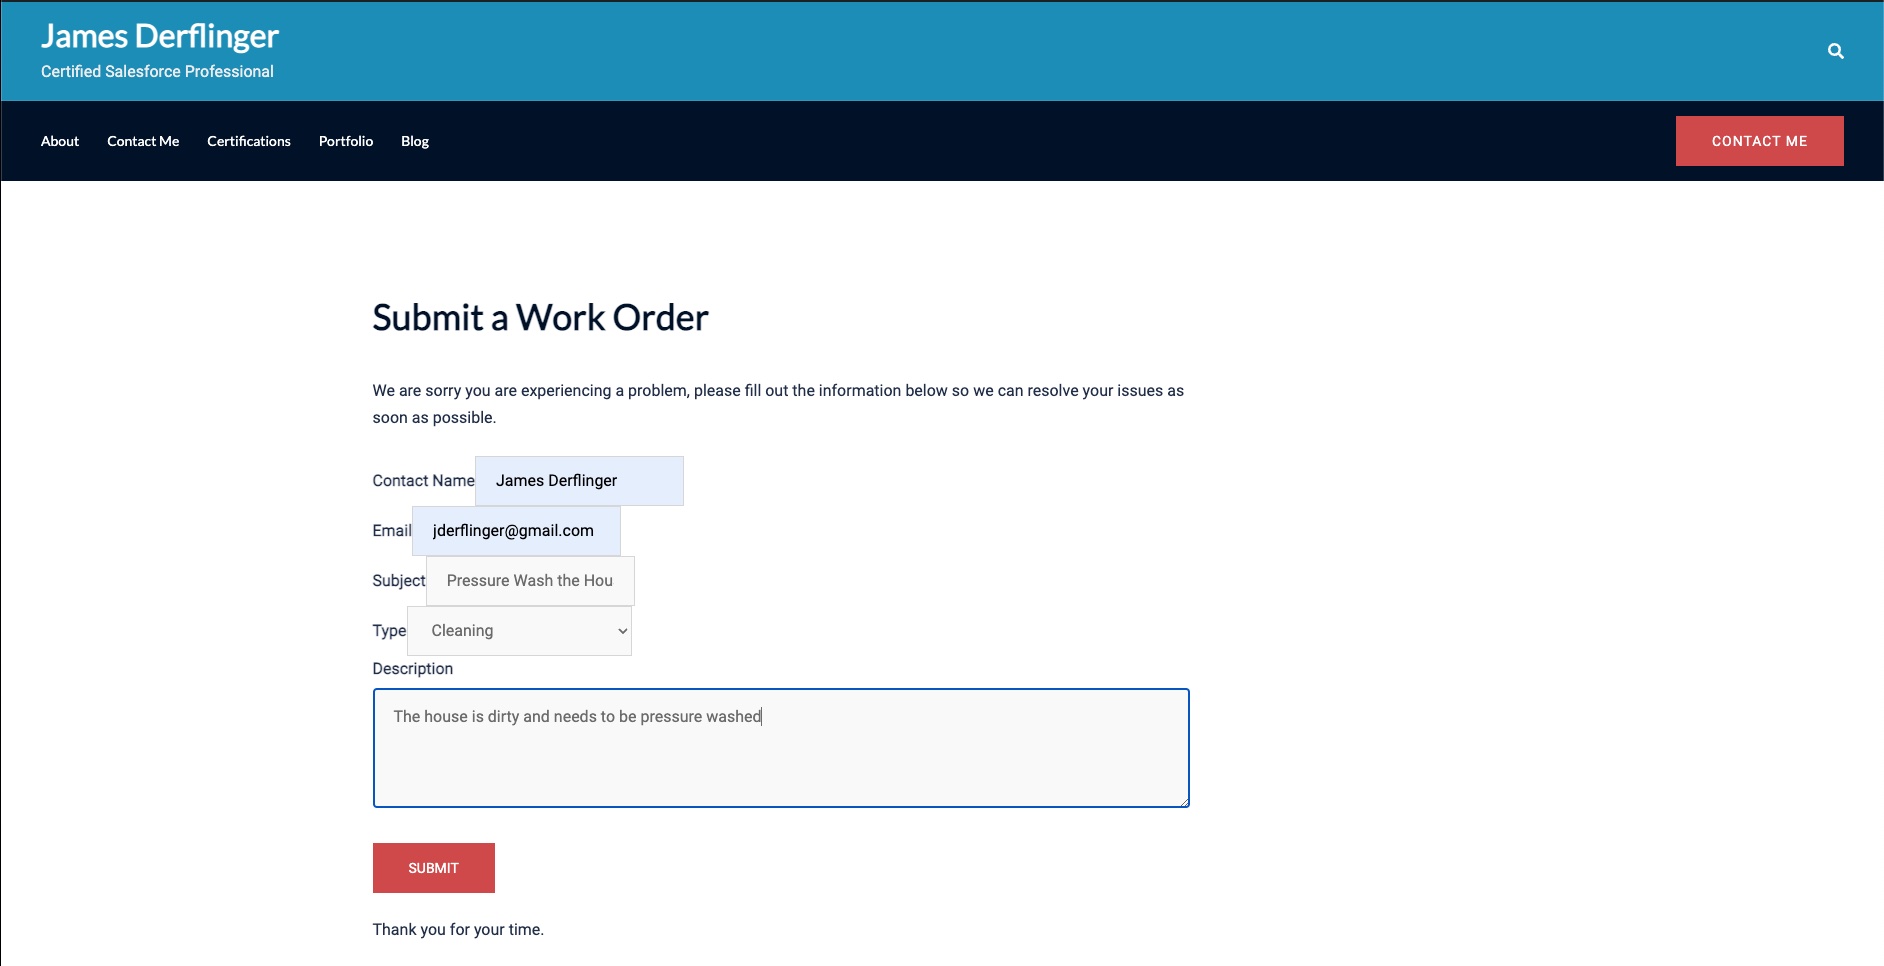
As you can see, I am already filling out information about a project I need to do; pressure wash the house. Once all the information is filled in, just hit Submit, and the user is redirected to the thank you page we linked earlier in HTML Generator Page.
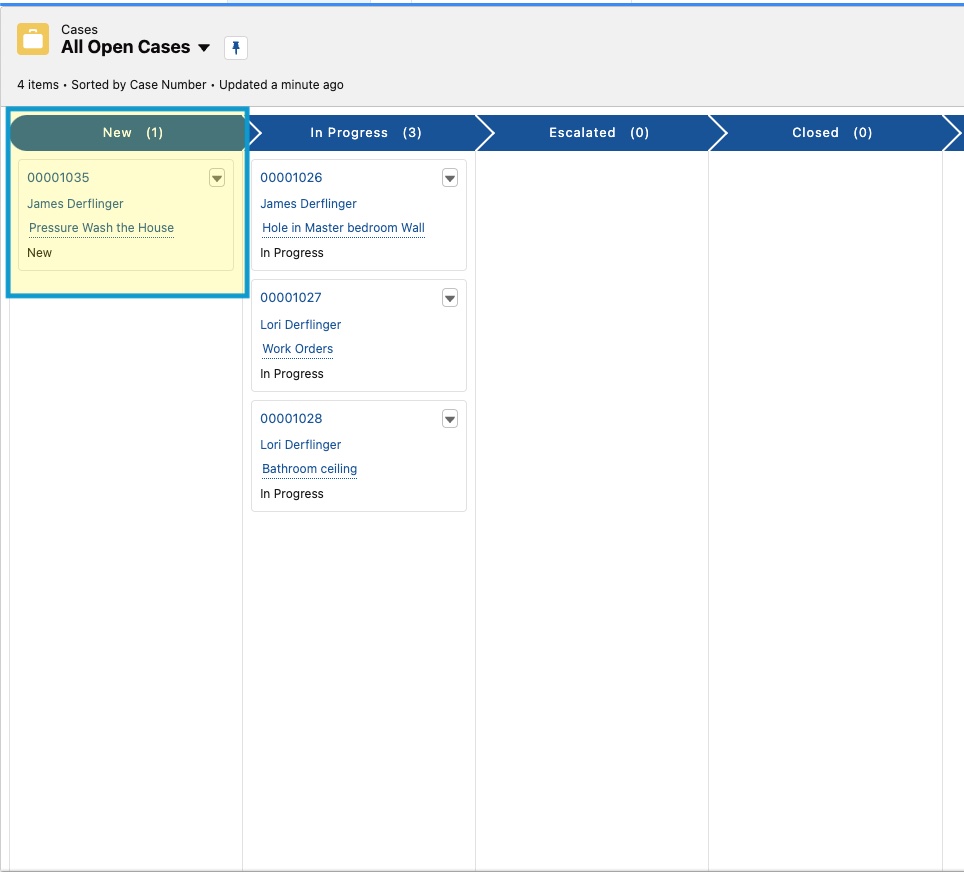
As you can see below, a new case has been created, and you can also see my wife has already started submitting things for me to do.
I hope this has helped you learn more about Web-to-Case, and as you can see, I have a lot of things to start checking off of my to-do list, so I should get started on that.